
Overpass 2 - Hacked, developed by NinjaJc01, is the sequel to the Overpass series, however, with a DFIR feel and approach towards it. Fortunate for me, this room doesn’t require having completed the first - although I imagine some of the story is wasted on me.
I decided to create a writeup this room in particular for a few reasons:
- Forensics is always a welcome surprise to me
- It’s a great practice room for people who are familiar with network forensics - whilst being approachable for people who are new.
- A large majority of the recognised write-ups are “brain dumps” in my opinion, not explaining any logic or thought - but just stating fact. Which isn’t necessarily bad per se, but for walkthrough rooms there’s always just that bit missing.
I’ll be using TShark - or terminal Wireshark and explaining my thoughts behind the process (filter commands included!)
1. Just Use Wireshark?
That’s a very valid question, and you’re right, using Wireshark is the more accessible way of approaching this room because of the use of a GUI - least not Wireshark’s GUI. However, taking a look at the rooms approved by the author of the room, everyone uses Wireshark :< I was determined to create a write-up for this room, but wanted to showcase an alternative method and practice my memory for TShark syntax.
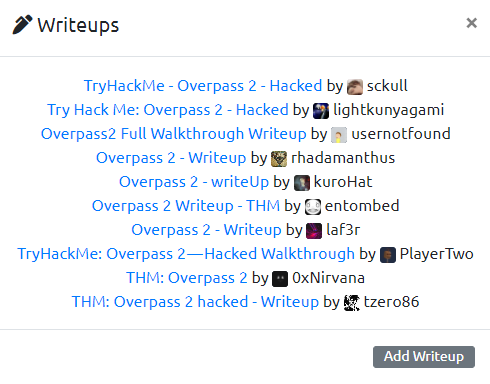
A list of the write-ups approved for Overpass 2 - Hacked at the time of publication. I wanted to be unique.
I’m going to provide this fantastic TShark cheatsheet for you to follow along with.
2. Using What’s Provided to Us
The tasks and questions following them give quite a lot of detail as to what we can expect and contextualise things rather well for us!
Task #1 & Q1 description:
Task: Overpass has been hacked! [...] Can you work out how the attacker got in, and hack your way back into Overpass' production server?

Q1: What was the URL of the page they used to upload a reverse shell?
We can expect to see communications with a webserver at the very least, this’ll be really good for our filtering.
3. Task #1 - Analyse the PCAP
3.1. Question 1 - Discovering the URL
But first, let’s see whose sending the most packets within this pcap. After all, if data has been stolen, they’d show up first!
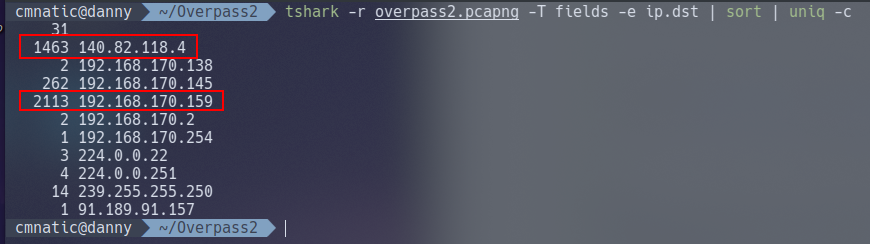
tshark -r overpass2.pcapng -T fields ip.dst | sort | uniq -c
| IP Address | Packet Quantity |
|---|---|
| 192.168.170.159 | 2113 |
| 140.82.118.4 | 1463 |
| 192.168.170.145 | 262 |
Note 192.168.170.159 being an internal IP - perhaps the web server? And 140.82.118.4 being a public-facing IP address, maybe the suspect?
Thankfully for us, TSharks filtering patterns work just like Wireshark does! Great! This mean we can use tshark -r overpass2.pcapng ip.dst=192.168.170.159 | head to list a handful of results for all the packets that 192.168.178.159 has received - who I believe to be the web server due to listing as the highest IP in our analysis so far.
Illustrating how similar the filtering is between TShark and Wirehsark, with Wireshark pictured last.


Note here that we can see HTTP traffic such as POST and GET requests to a URL destined for who we think is the web server from an IP address that isn’t the public-facing 140.82.118.4. Well, at least we’ve got our web server confirmed and the first question answered.
3.2. Question 2 - Finding out What Payload was Used
We should export the entire output to a file for better analysis outside of our terminal. Since we know that 192.168.170.159 is the web server and 192.168.170.145 has been sending traffic to the web server, let’s see this in it’s entirety - where we should hopefully see a lot more data being exfiltrated.
And indeed we can.
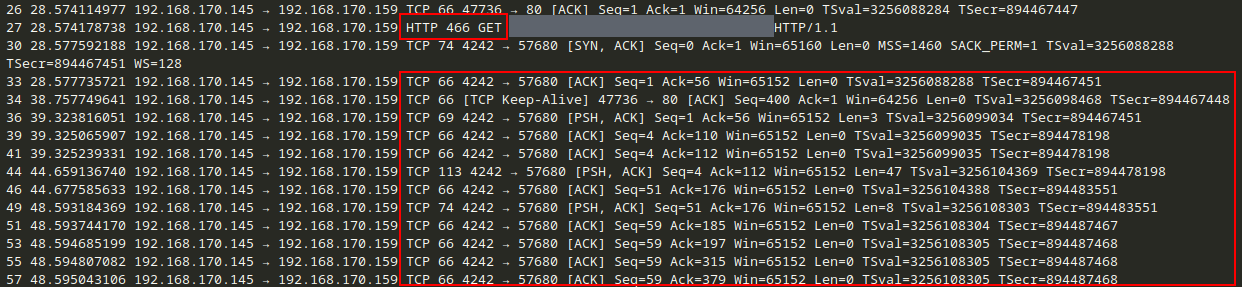
Note here another GET request to the payload and then a lot of TCP traffic from the web server - uh oh.
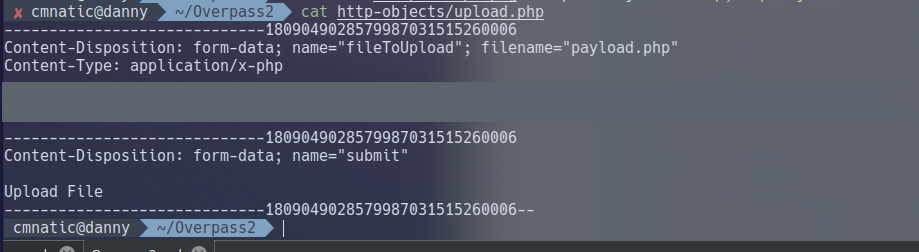
Let’s export all of the “Objects”. At a very brief summary, “Objects” are the resemblence of pieces of data transmitted across a network. We’re going to be extracting files sent over HTTP for us to analyse
tshark -r overpass2.pcapng --export-objects "http,http-objects"
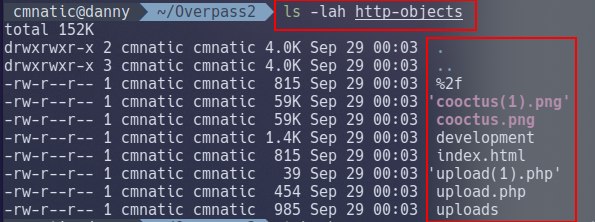
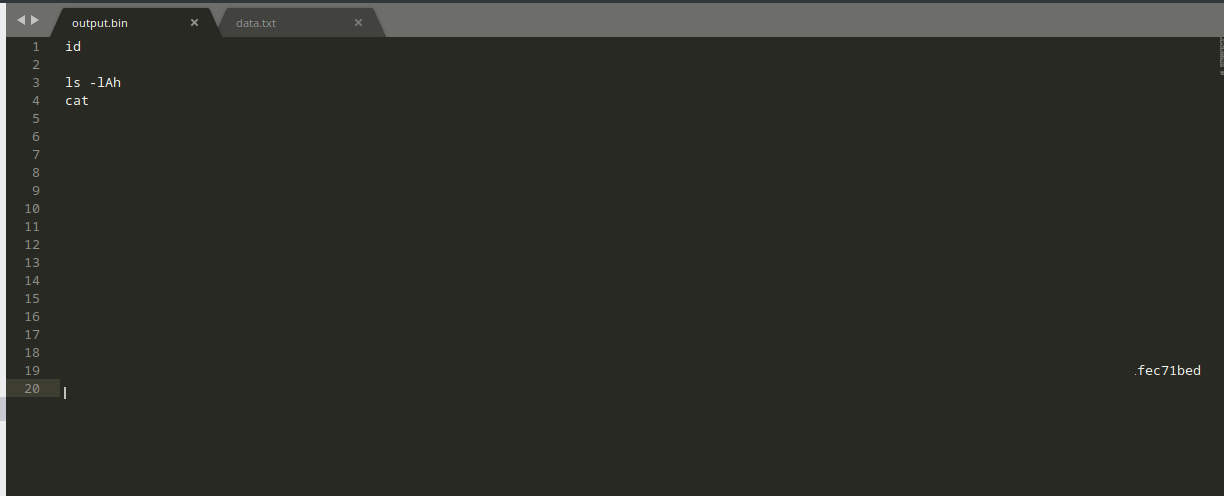
Let’s output the contents of the shell for the answer.
3.3. Question 3 (+4) - What password did the attacker use to privesc?
Here’s where using TShark over Wireshark becomes a bit of a pain. We need to view the data frame within the TCP packet for this.

Wireshark makes it easy with it’s inbuilt hex-viewer, we unfortunately do not have that luxury in this case.
Take for example the screenshot below.
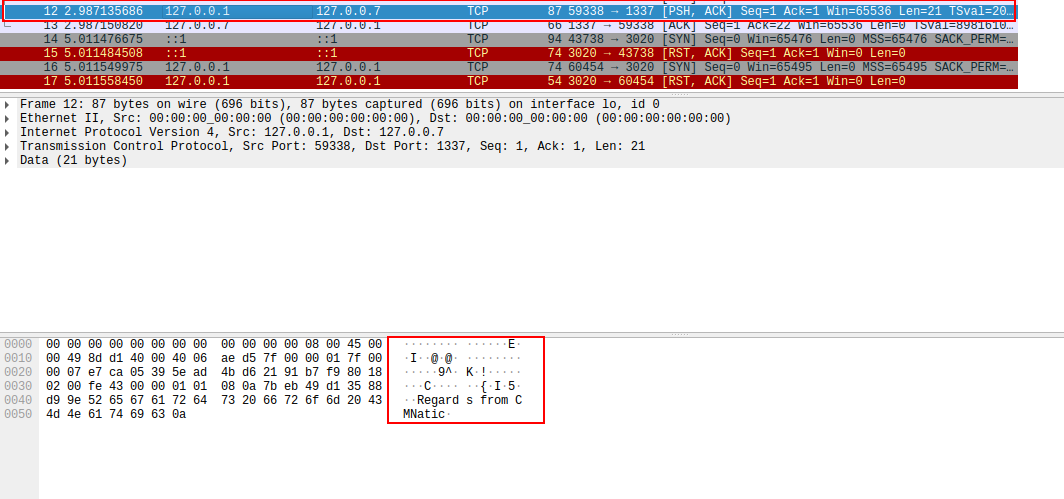
Here I have opened Wireshark, started a capture sent a message to myself over the network with “Regards from CMNatic”
Wireshark has an in-built hex and ascii viewer when selecting individual packets, hence why we can clearly see “Regards from CMNatic” in the bottom pane. With TShark, we have to extract this data in it’s raw form and convert it into something readable; we’ll come onto doing this later, but it’s a redeeming feature of TShark because of the ability to filter and export large quantities of data for later user.
3.3.1. The Problem
We can output the TCP data from every packet manually, but there’s 3,836 thousand TCP packets. That’s a lot of data to comb through; TShark isn’t super capable of being automated to process what we need.
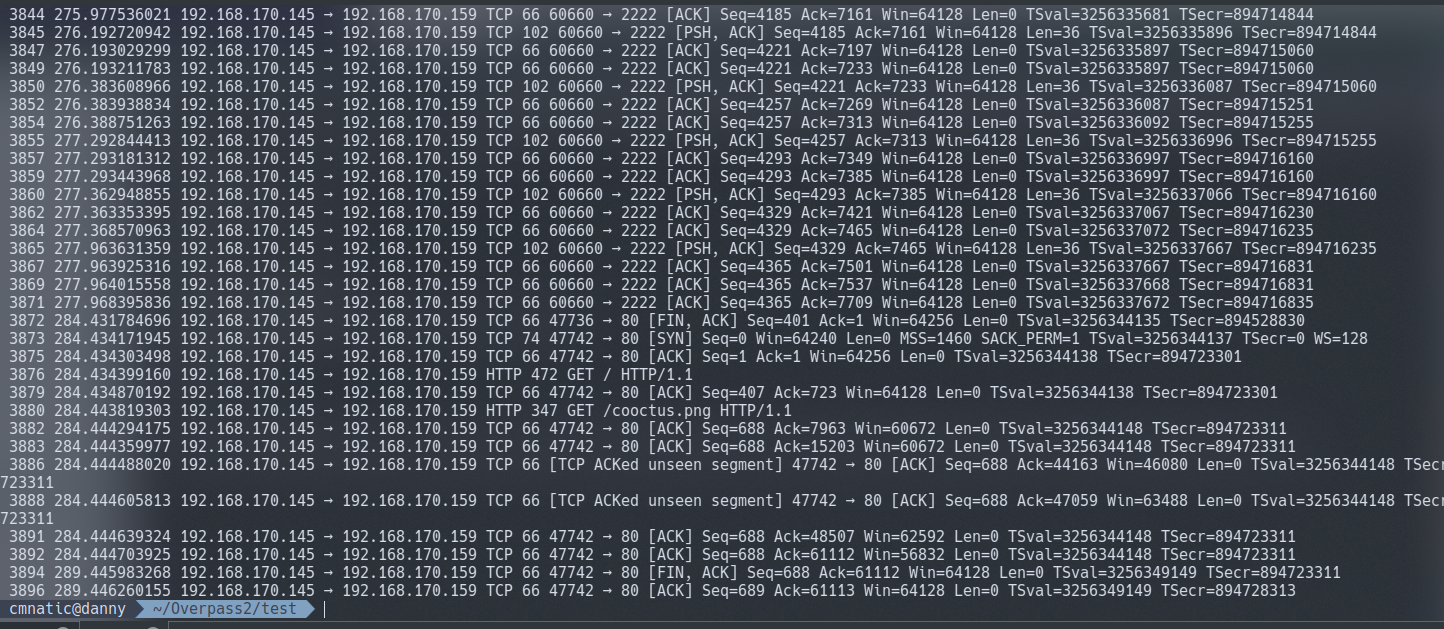
We can list all TCP to and from the webserver, but all we are given is the TCP segments - not very helpful with so much data.
tshark -r ../overpass2.pcapng -Y 'ip.src==192.168.170.145 and ip.dst==192.168.170.159 and tcp
My solution to this is a little bit “hacky”, but it does however work. I want to avoid explaining exactly how to use TShark in wait for a TryHackMe room I’m developing, but I’ll break down the command I used.
We can observe from previous dumps that there’s TCP communication from 192.168.178.145 (the hacker) and 192.168.170.159 on a few ports including:
- 4242
- 57680
So let’s use more filtering to output the specific port, in this case 4242
tshark -r ../overpass2.pcapng -Y 'ip.src==192.168.170.145 and ip.dst==192.168.170.159 and tcp.port==4242' -T fields -e tcp.payload
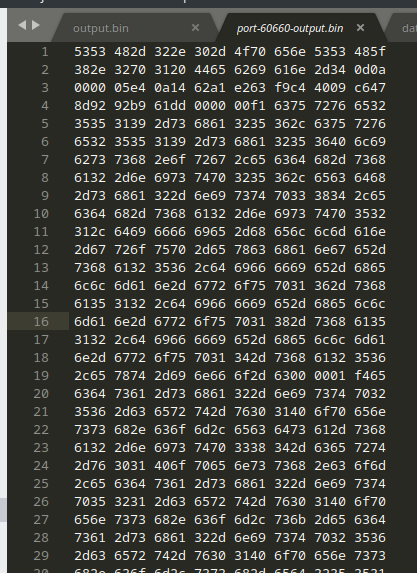
Producing an output of:
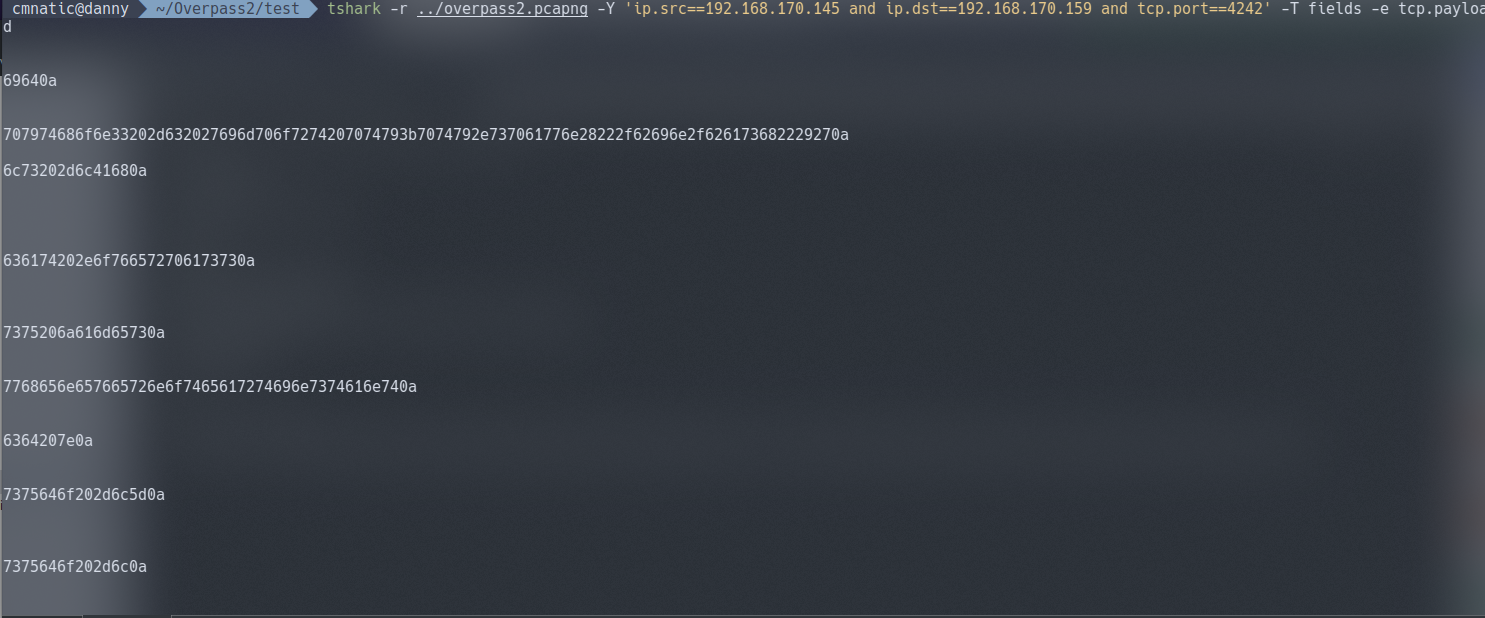
It’s certainly not in normal text. It’s in fact in a hexadecimal formatting due to how tshark works with this specific syntax. We need to use a hex converting tool such as xxd to translate this data for us into a readable file.
3.3.2. The final command being:
tshark -r ../overpass2.pcapng -Y 'ip.src==192.168.170.145 and ip.dst==192.168.170.159 and tcp.port==4242' -T fields -e tcp.payload | xxd -r -ps > port-4242-output.bin
Here we’re doing the following:
- Reading from
overpass2.pcapng - Using filters to only out put packets where all of the following is true:
- are from the hacker (192.168.170.145)
- destined for the web server (192.168.170.159)
- over TCP on port
4242
- Exporting the payload (the data!) from the TCP payload
- Using
xxdto convert from hex and save it into a new calledport-4242-output.bin
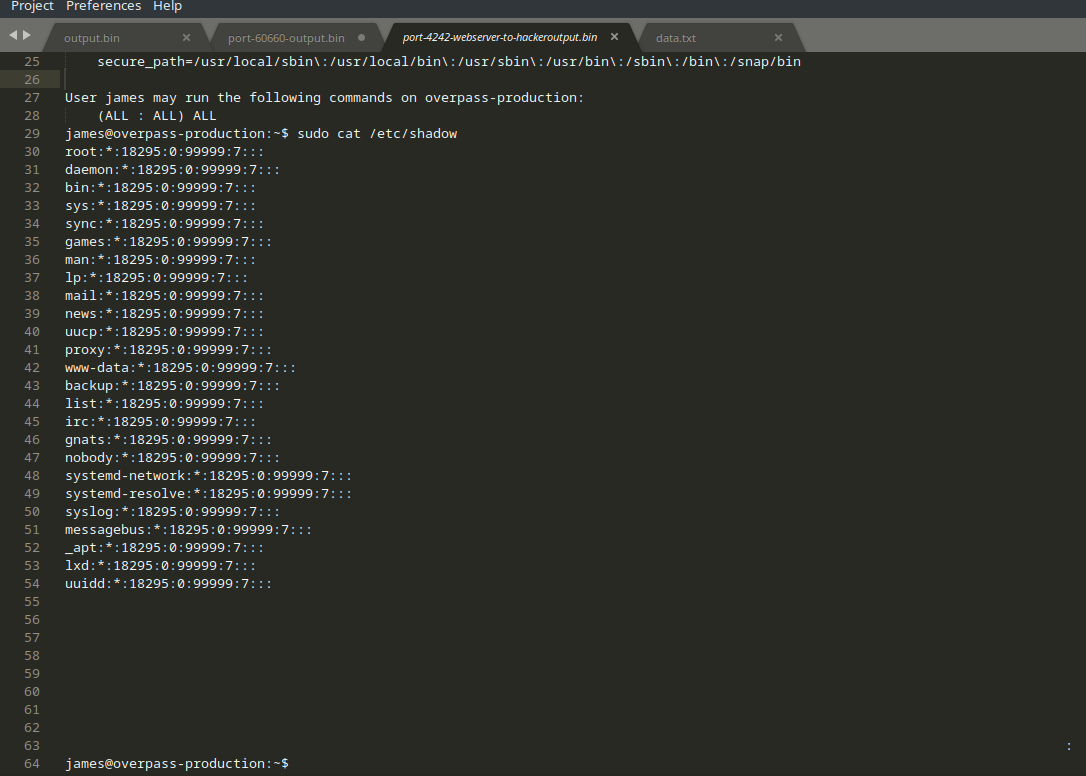
Resulting in a human-readable output of all the commands performed over the hacker’s netcat shell. This will provide the answer to questions 3 and 4.
3.4. Question 4 - How did the attacker establish persistence?
This question can be answered be looking at the output found for question 3. Look at what’s been downloaded and research into it.
3.5. Question 5. - Using the fasttrack wordlist, how many of the system passwords were crackable?
Looking back at our output, as the hints suggests, the attacker outputted the /etc/shadow file. We need to swap our filters around as currently we’re only filtering for data going from the attacker to the web server - and not the other way around.

Looking at our output from TShark gives us the contents of /etc/shadow to crack
You’ll notice here that there’s no output on port 4242 after the backdoor has been established. We must assume that the attacker connected to and started using the backdoor instead.
Looking back at our dumps, we can see a sudden start of TCP traffic on from 60660 <-> 2222, what’s the chances that’s the port for the backdoor?
We need to remember that now the attacker is connecting via SSH - the traffic is gonna be encrypted! No use here.
4. Task #2 - Analyse the code
I’m going to leave you mostly to your own devices for this one. The task is all about researching and utilising the knowledge that we have at hand.
4.1. Questions 1 & 2 - Hashes & Salts
As per the task, Question’s 1 and 2 require you to research into the code of the backdoor. We discovered previously how it was installed so that’ll be a good place to start looking!
4.2. Question 3 - What was the hash that the attacker used?
As the task suggests, return to the PCAP file. We saw an output of the commands performed in Task 1 Question’s 3 & 4.
4.3. Question 4 - Crack the hash
Nice and easy this one. Remember, it’s salted so online tools won’t work. But that’s no biggie, we know the salt!
Let’s just throw it into Hashcat
Refer to the Hashcat manual for the attack mode you need to use and the expected formatting of the hash.
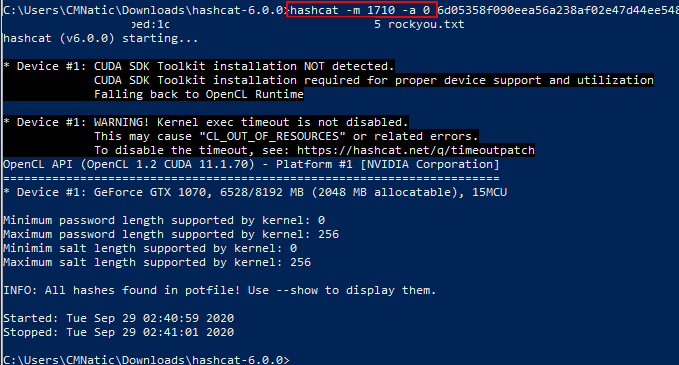
And now we can login and finish up the last task.
5. Task 3 - Attack - Get back in!
Let’s get our box back!
5.1. Question 1 - The attacker defaced the website. What message did they leave as a heading?
Remember from our PCAP analysis that there was a URL accessed by the attacker?

5.2. Question 2 - Using the information you’ve found previously, hack your way back in!
Now we can log back into the box using the exact same backdoor that was conveniently left behind for us; Since we have cracked the password and know that it’s running on port 2222
5.3. Question 3 - What’s the user flag?
Log into the box and it’s located in the users directory.

5.4. Question 4 - What’s the root flag?
Hopefully by discovering the user flag you would of also found a file with a SUID bit set for root. GTFOBins is perfect for this sort of escalation method.Let’s use that!

6. Fin.
What a fantastically fun room. Many thanks to NinjaJc01.
Hopefully you’ve found this approach to the room refreshing and a much more direct and efficient way of extracting the data we need from the PCAP file (if you know how to use TShark).
TShark is fantastic for being able to filter and split large PCAP files into other programmes or other PCAP files! We were able to use common linux commands such as head and unique, with the ability to use awk and grep alike for much more advanced processing of data!
So long and thanks for all the fish ~CMNatic